Getting Started with Hoisted and Telegram

Telegram is a project by David Pollak, the creator of the Lift web framework, that provides hosting for websites using the Hoisted Content Management System. Hoisted takes a set of input files in HTML, XML, Markdown, RTF …, plus (optionally) an HTML template, and transforms them into a static website. Telegram is basically “Hoisted as a Service”, publishing your website at https://yourname.telegr.am (or a custom domain), and is able to get the input files from Github or Dropbox, i.e., when you push to Github or save a file in a Dropbox folder, the website is re-deployed.
A Minimal Website
Hello, World!
As mentioned, Telegram uses Hoisted, so while developing a website, you can simply use Hoisted as outlined on https://howto.telegr.am/recipes/live_and_local. The simplest possible website you could imagine can be created as follows:
- Create a folder
website, - put a file
index.mdwith the contentHello, world!into that folder, - run
java -jar hoisted.jar -server websitewithhoisted.jarfrom here, - check http://localhost:8080.
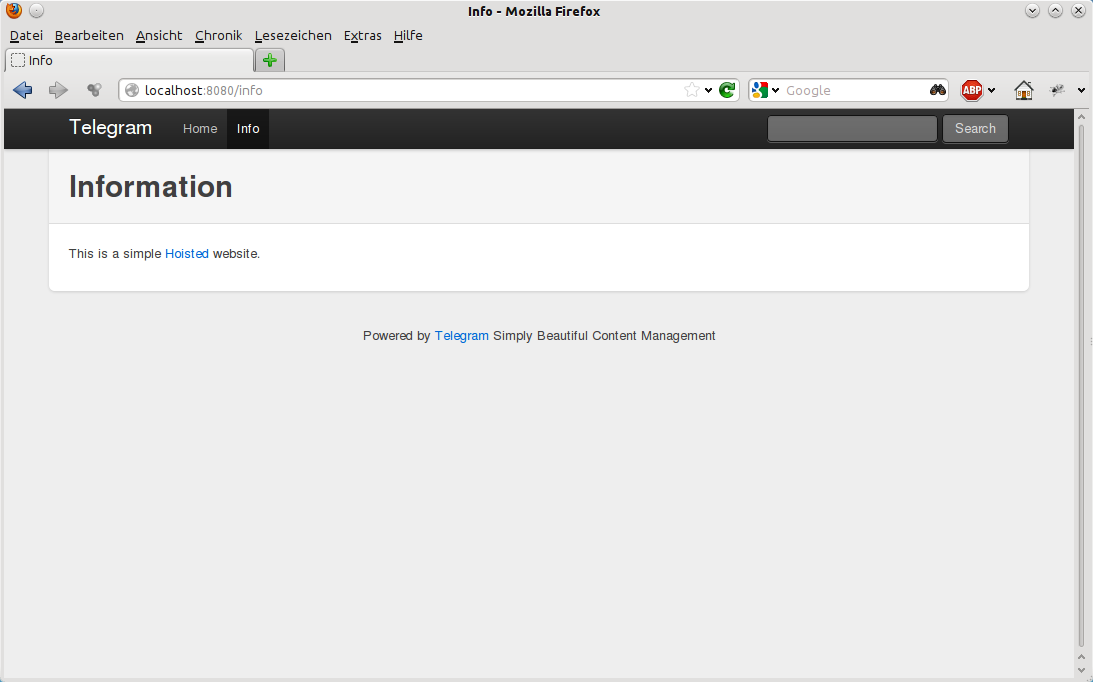
The result looks like this (click to zoom):

A Second Page
Now a lot of black magic seems to have happened here. We see a complete webpage with a navigation bar and the “Hello, world!” text in the content area of the page. Before we look deeper into that black magic, let's add another file, info.md with the content
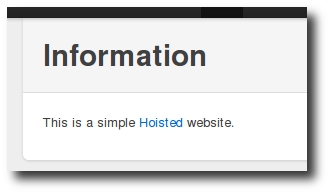
# Information

This is a simple [Hoisted](https://github.com/hoisted) website.
to the website folder. Reload the page (no need to restart the java process) and you will see that a new entry “Info” appeared in the navigation bar at the top. Click on it and see the following page at http://localhost:8080/info:
How Does It Work?
So what does Hoisted do, given the two files in our folder, in order to produce that output?
Markup Processing
First of all, it transforms the content of the *.md files into HTML using a Markdown processor. You can as well use *.html files and put in there only the HTML for your page body, e.g. <p>Hello, world!</p>.
Template Surrounding
Once the page body is transformed into HTML, it is surrounded by some template. Since obviously we didn't specify any template to use yet, Hoisted takes the default template that can be found at https://github.com/telegr-am/template-base; more precisely, the templates-hidden/default.html file therein. (In fact, if you want to use your own template, you can just create a file templates-hidden/default.htmlin your website folder.)
The HTML that was generated for the page body is now inserted in the template at the position of the element with id content. That is, the fragment
...
<div id="left_side">
  <div id="content">Content goes here</div>
</div>
...
in the default.html results in
...
<div id="left_side">
  <p>Hello, world!</p>
</div>
...
in the final HTML output.
The Navigation Bar

To see where the navigation bar is coming from, we need to examine the template further. You will quickly notice that some HTML elements in the template have data-lift="xyz" attributes. This is the way that content goes into templates in the Lift framework, and xyz is called a “snippet”. Basically, “xyz” is a Scala function that takes some XML (namely, the element with the data-lift="xyz" attribute) and returns some XML; usually a transformed version of the input. For example, in the template, there's a line:
<a data-lift="site.name" class="brand" href="/">Telegram</a>
The site.name snippet replaces the content of the input XML with the site's name, so that the output in the final HTML will be
<a class="brand" href="/">Telegram</a>
(Since we didn't specify the site's name yet, the snippet doesn't do anything.)
Now the menu is generated by the following template code:
<ul class="nav">
    <li data-lift="menu.items"><a href="#">Home</a></li>
</ul>
The menu.items snippet creates a copy of the <li> element for every page that exists in the website, replaces the <a> element's href attribute by the correct link and its body by a properly capitalized version of the page title.
<ul class="nav">
    <li class="active"><a href="/">Home</a></li>
    <li><a href="/info">Info</a></li>
</ul>
Other Snippets
Other snippets that are used in the default template are
menu.titleas in<title data-lift="menu.title"></title>, which inserts the title of the current page (as it is displayed in the navigation bar) into the element,searchas in<form data-lift="search" style="float: right"></form>, which inserts a search form (using Google “site” search),move_topas in<div class="content" data-lift="move_top?from=left_side&to=page_header">...</div>, which basically moves the first child of theleft_sideelement to thepage_headerelement (if some conditions are met, see the docs), andembedas in<div data-lift="embed?what=/templates-hidden/include"></div>, which embeds another template, allowing for easy template code reuse.
The documentation (if present) for all snippets can be found at https://howto.telegr.am/snippets.
At the time of writing, the functions earlyBaseSnippets and baseSnippets in Hoisted's EnvironmentManager.scala define how snippets are mapped to Scala functions; I'm afraid that looking into the source may be necessary at one point or another to understand how a snippet works…
Customization Using “Extra Info”
Menu Name and Page Title
We have seen that apparently the filename of the “Info” page (info.md) determined the path it can be accessed at (/info, but /info.html will also work), the name of the page in the navigation bar, and the <title> of the page. Now we might want to control those aspects independently of each other and also independent of the file name – and that's where “Extra Info” comes into play. Basically, “extra info” is a set of key: value lines at the top of your input files that contain meta information about that page.
For example, change the info.md file to look as follows:
menu: Info Page

# Information

This is a simple [Hoisted](https://github.com/hoisted) website.
The result is that both the navigation bar as well as the <title> of the page now show “Info Page” instead of just “Info”. If you want the <title> to say something else, for example, for SEO purposes, include another line at the top of the file with title: Information About My Project.
Other Extra Info
We'll cover specific use cases for certain extra info tags later, but some of general interest are:
path: Sets the path where the page can be accessed at. For example,path: blubwill make Hoisted serve the page at/blub. (Note that in-servermode, this seems to be broken at the time of writing.)redirect: Makes the menu item of this page a link to the specified URL. For example,redirect: http://www.google.comwill create a link to google.com in the navigation bar instead of a link to/info.site_title: This globally sets the title of this site as returned by thesite.namesnippet. If you addsite_title: My Websiteinto any of your files, you will see that “Telegram” in the navigation bar is replaced by “My Website”. However, I recommend to put all global extra info items into theindex.mdfile, in order to avoid confusion.
The documentation (if present) for all extra info tags can be found at https://howto.telegr.am/extra_info.
Common Website Features
Let's demonstrate how to build a small website that matches some common requirements like a URL hierarchy, primary and secondary navigation, a customizable <title> etc.
We start with a very basic HTML template as templates-hidden/default.html using, just for simplicity, the Blueprint CSS framework. I have set up a git repository at https://github.com/tgpfeiffer/hoisted-base where you can see the code for this section; the final page can be seen at https://startingpoint.telegr.am/.
Page Title
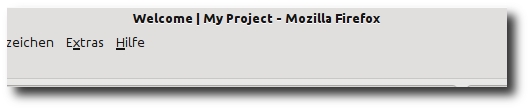
First, we want the <title> tag to display the current page title, but also the site name, in a format like {page title} | {site name}. In order to do so, we use the title snippet, the menu.title snippet, and the site.name snippet like so:
<div data-lift="title">
  <span data-lift="menu.title"></span> | <span data-lift="site.name">Site Name</span>
</div>
Note that while site.name replaces the content of the <span> with the site name, menu.title appends the page title to its content, that's why the first <span> must remain empty. The title snippet takes the content of the element, removes the HTML stuff from it, embeds it into a <title> tag and moves this to the HTML <head>. So in order for this to work, you should remove any existing <title> tag from the <head>.
The result is a <title> with the content “Welcome | My Project” for the front page.
Create Dummy Content
Now let's create a number of dummy pages so that we obtain the following directory structure:
index.md
projects.md
projects/
  a.md
  b.md
skills.md
skills/
  scala.md
  html.md
contact.md
Later on, we want the pages “index”, “projects”, “skills”, and “contact” to appear in the primary navigation, while the subpages of “projects” and “skills” appear only in submenus if the respective category is active.
Primary navigation

First, if we use the menu.items snippet as in the default template from the previous section, we would get all of the pages defined in our website, which is not what we want here. The alternative is the xmenu snippet, that supports the display of only a certain “locgroup” (which is Lift-speak), but requires a menu extra info to be set. So first, add the extra info line menu-locgroup: primary and an appropriate menu line to all of the pages that are to become a part of the primary navigation bar (here: index.md, projects.md, skills.md, and contact.md). While you're at it, also insert an order: N (with N a natural number) extra info line that determines the order of the menu items for the navigation (otherwise they'll be ordered alphabetically by menu name).
Now we need to create a code snippet in our HTML template as follows:
<ul>
  <li data-lift="xmenu?locgroup=primary"><a href="#">Page Title</a></li>
</ul>
This snippet will insert a <li> node for every menu item in that locgroup, set link name and target appropriately, and also add an active class to both <li> and <a> element of the active page, so that you can style it using CSS.
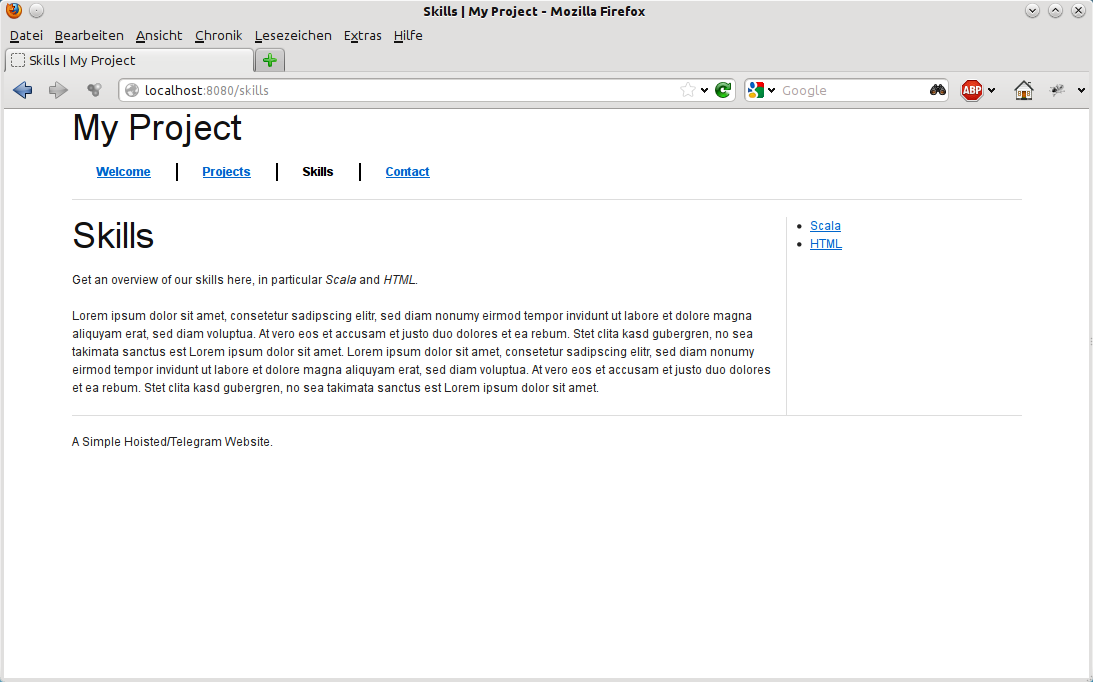
Subnavigation
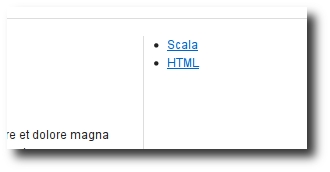
One way to achieve a subnavigation for out “projects” and “skills” categories is to add those pages to a different locgroup. While Hoisted serves the a.md file at /projects/a, it does not, as far as I can tell, infer any kind of hierarchy information, so we'll have to do a bit of manual work.
First, add menu, menu-locgroup, and order extra info lines to all files in the projects and skills subdirectory, with menu-locgroup: projects and menu-locgroup: skills, respectively.
There are now different ways to get this submenu displayed at only the desired pages, which we will use both for the sake of demonstration.
Create a new template
templates-hidden/default_skills.htmlthat displays thexmenufor theskillslocgroup at an appropriate position. Use this template from the respective files by using thetemplate: default_skillsextra info line. By using thesurroundsnippet in thedefault_skills.htmlfile, you can embed thedefault_skillstemplate at a given element of thedefaulttemplate, thereby reducing code duplication.Add the navigation to the default template and put it in a conditional block that's only shown if a certain extra info line is set. The conditional block is created using the
ifsnippet:<nav data-lift="if?extra=show_projects_nav">...</nav>This block will only be shown if the current file has a
show_projects_navextra info line. So, addshow_projects_nav: trueto all files that should display this project subnavigation. The body of this<nav>block will be generated by the now-familiarxmenusnippet for theprojectslocgroup.
Publishing the Website
So far, we have only seen Hoisted features. We could now say java -jar hoisted.jar website/ output/ and get the static HTML files in the output folder, that we could then upload to any web server. However, the benefit of Telegram is that it is super-easy to automate this deployment process and not worry about file permissions, syncing etc.
For example, all that was necessary to publish the website at https://startingpoint.telegr.am/ was to link my Github account with Telegram, that will now automatically detect changes and redeploy the website. For non-techies, the Dropbox integration might be better suited.
NB. While you don't have to worry about server administration when using Telegram, you also can't do it yourself. For example, right now, the website doesn't work correctly, as nginx seems to append a trailing slash for URLs that match both a page and a directoy, like /projects.
Conclusion
Hoisted seems to work very well for small websites that require only static pages. Better, at least, than all the mkwebsite.py scripts I used to write for that purpose years ago ;-) The documentation, well, “needs some love”… As for the Lift framework (which is, in a way, the mother of Hoisted), the public source code – both of the available templates and of Hoisted itself – is often the only documentation of a functionality. Knowledge of common Lift snippets (like surround) will definitely help. However, the “howto” documentation on https://howto.telegr.am/ is open for contribution by the public.
Telegram itself makes it super-easy to collaborate since Git(hub) and Dropbox are tightly integrated. To be honest, I haven't played with Telegram's functionality too much, but it seems that there are a lot of interesting features, in particular for bloggers, for example when it comes to posting new content (e.g., via email).
I hope that I made it easier with this post to get into Hoisted and get something running quickly, and look forward to receiving your feedback!